How to...
-
%(#ffffff)[How to publish a package with npm:]
*Sign in with npm login:
npm loginYou’ll be prompted to enter your username, password, and email address.
*Create a folder named how-to-publish-to-npm:
mkdir how-to-publish-to-npm*Navigate into the folder:
cd how-to-publish-to-npm*Begin the project with the npm init command:
npm initThis command runs you through a few questions and creates a package.json file for you at the end. This package.json file contains the bare necessities you need to publish your project. (Feel free to skip questions that don’t make sense).
*The final step is to publish your package with the npm publish command:
npm publish
-
How to set permissions in linux with chmod:
chmod 600 {filespec}	You can read and write; the world can't. Good for files.
chmod 700 {filespec}	You can read, write, and execute; the world can't. Good for scripts.
chmod 644 {filespec}	You can read and write; the world can only read. Good for web pages.
chmod 640 {filespec}	You can read and write; group can read, the world can't do anything.Good for group project..
chmod 755 {filespec}	You can read, write, and execute; the world can read and execute. Good for programs you want to share, and your public_html directory.
chmod 750 {filespec}	You can read, write, and execute; the group can read and execute, the world can't do anything. Good for programs you want to share within group.
-
How to install WebODM on Windows 10 home:
- Download Docker Toolbox and install it as an administrator. (You may need to uninstall VirtualBox first.)
- Launch Docker Quickstart Terminal as an administrator. Note down the IP address shown below the whale.
## . ## ## ## == ## ## ## ## ## === /"""""""""""""""""\___/ === ~~~ {~~ ~~~~ ~~~ ~~~~ ~~~ ~ / ===- ~~~ \______ o __/ \ \ __/ \____\_______/ docker is configured to use the default machine with IP 192.168.99.100 For help getting started, check out the docs at https://docs.docker.com- Download WebODM with Git and start it:
git clone https://github.com/OpenDroneMap/WebODM --config core.autocrlf=input --depth 1 cd WebODM sh ./webodm.sh start- Navigate to port 8000 of the IP address recorded in the first step:
http://192.168.99.100:8000- It is advisable to resize the VM associated with WebODM.
cd "C:\Program Files\Oracle\VirtualBox"
./VBoxManage clonemedium disk --format VDI "C:\Users\username\.docker\machine\machines\default\disk.vmdk" "C:\Users\username\.docker\machine\machines\default\disk.vdi"

./VBoxManage modifyhd "C:\Users\username\.docker\machine\machines\default\disk.vdi" --resize 100000
After resizing you will need to use a GParted VM to resize the partitions.
- If you want to stop WebODM then use the command:
sh ./webodm.sh down- To completely stop WebODM you will have to also stop the VirtualBox VBoxHeadless process using the Windows task manager
-
How to pipe output from a shell command to Perl to a shell command within a Perl script:
$com='samtools view -h '.$infile;
my $zom='samtools view -bS - > q64converted.bam';
open(SBAM, "$com|");
open SBOUT, "|$zom";
while (<SBAM>){
	print SBOUT "$_";
}
close(SBAM);
close SBOUT;
-
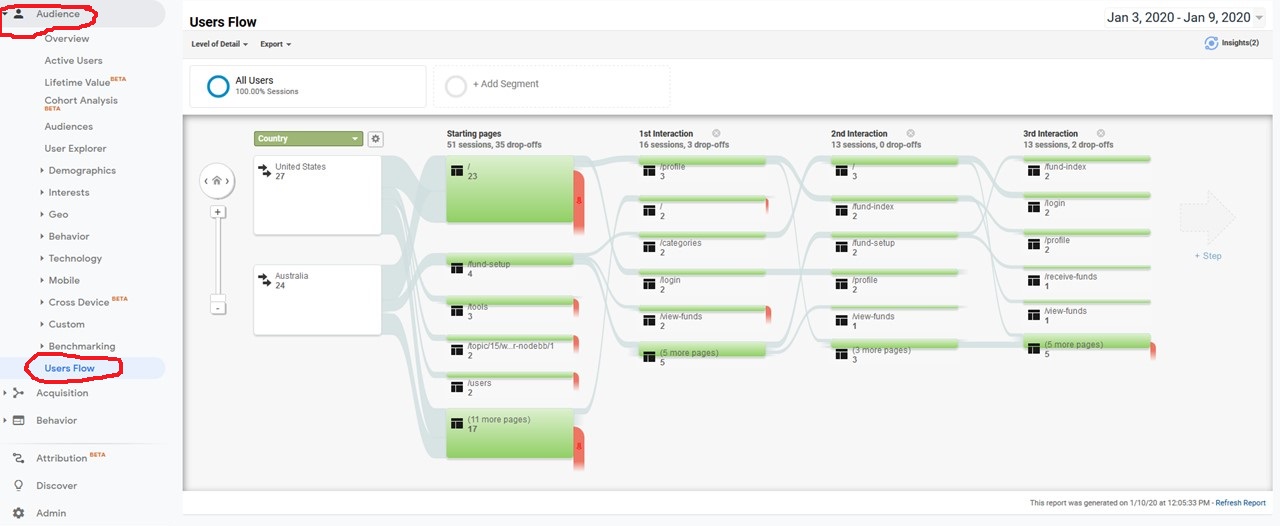
How to find out which pages are visited according to user country in Google Analytics:
-
How to horizontally split a file view in sublime text editor:
Split the view by using View -> Layout -> Rows: 2. Then select Row 1 and go to File -> New View into File. It will open second tab with the same file. Then you can drag that tab to the Row 2.
-
How to push a docker image to Docker Hub:
- You need to have an account on Docker Hub. In this example the account is named 'ning'.
- The image must be built so that the account name is within the image name
Eg. for docker command:
docker tag nextflow_docker:202004201512 ning/nextflow_docker:202004201512- For a docker-compose file:
version: '3' services: nextflow_docker: build: ./nextflow_docker image: ning/nextflow_docker:latest- Then you need to push:
docker logout
docker login
#login with your username and password (if you are on ubuntu you can ignore password keyring (agree but dont enter a password)
#NB. If you are on ubuntu and get the error message "Error calling StartServiceByName for org.freedesktop.secrets: Timeout was reached" , try the following command "sudo apt remove gnome-keyring golang-docker-credential-helpers"
docker push ning/nextflow_docker:latest
-
How to translate a singularity recipe into a Dockerfile:
- First install spython:
git clone https://www.github.com/singularityhub/singularity-cli.git cd singularity-cli python3 setup.py install- Then perform the conversion:
spython recipe /input/path/to/singularity/recipe/Singularity /output/path/to/Dockerfile
-
How to resize the left and right padding in large screens with CSS. (NB. Probably better to use bootstrap with 3 columns instead):
- In the head section:
<head>
  <meta name="viewport" content="width=device-width, initial-scale=1.0">

  <style>
    @media screen and (min-width: 768px) {
        body {
            padding-left: 100px;
            padding-right: 100px;
        }
    }
  </style>

</head>
-
How to horizontally write the address on an envelope in Japan:
〒106-0044東京都港区東麻布1-8-1 ISビル4F GPlusMedia
-
How to find the meanings of symbols in R:
?"@"
?"[["
-
How to overcome the following error message in Rstudio:
WARNING: Rtools is required to build R packages but is not currently installed. Please download and install the appropriate version of Rtools before proceeding:In the R console:
#Find where Rtools is installed:
Sys.which("make")

#Find where .Rprofile or .Rprofile.site is (my .Rprofile.site was in C:\R\R-3.6.2\etc):
Sys.getenv("HOME")
Add these two lines to .Rprofile.site (or .Rprofile):
Sys.setenv(PATH = paste("C:/rtools40/usr/bin", Sys.getenv("PATH"), sep=";"))
Sys.setenv(BINPREF = "C:/rtools40/mingw_$(WIN)/bin/")
-
How to use caret library from R to create folds for k-fold validation:
# Import caret
library(caret)
# 10-Fold cross validation
valid_sets = createFolds(1:nrow(data), k = 10)
How to create a vector with 10 zeroes in R:
vector = numeric(length(1:10))
-
How to find the most common element in a vector in R:
mostCommon <- function(x){
     un <- unique(x)
     un[which.max(tabulate(match(x,un)))]
}
-
How to normalise data in R:
#@@@@@@@@@@@@@@@@@@@@@@@@@@@@@@@@@@@@@@@
####FUNCTION THAT CAN BE USED TO SCALE TO ANY RANGE
#@@@@@@@@@@@@@@@@@@@@@@@@@@@@@@@@@@@@@@@
#define the function
    #x is the input vector
    #y is the scale (eg. you can use eg 1:100 or c(1,100))
normaliza <- function(x,y){
  xin<-as.numeric(x)
  yin<-as.numeric(y)
  xmin<-min(xin)
  xmax<-max(xin)
  ymin<-min(yin)
  ymax<-max(yin)
  nza<-rep(0,length(xin))
  counta<-1
  for(i in xin){
    new<-(((i - xmin)/(xmax - xmin))*(ymax-ymin))+ymin
    nza[counta]<-new
    counta=counta+1
  }
  return(nza)
}

#define the scale
y<-c(0,10)

#an example with a vector:

#define a vector
test_vector<-1:100
#test the function on a vector
nzt<-normaliza(test_vector,y)
sort(nzt)

#an example with a dataframe

#define a dataframe
test_frame<-as.data.frame(cbind(test_vector,test_vector))
#test the function on a dataframe
nzt_frame <- as.data.frame(lapply(test_frame, normaliza,y=y))
nzt_frame


#@@@@@@@@@@@@@@@@@@@@@@@@@@@@@@@@@@@@@@@
#### FUNCTION THAT CAN SCALE FROM 0 to 1
#@@@@@@@@@@@@@@@@@@@@@@@@@@@@@@@@@@@@@@@

#define the function:
normalize <- function(x) {
    return ((x - min(x)) / (max(x) - min(x)))
}

#test on a data frame:
nzt_frame <- lapply(test_frame, normalize)
nzt_frame
#@@@@@@@@@@@@@@@@@@@@@@@@@@@@@@@@@@@@@@@
-
How to apply a function with multiple parameters in R:
mylist <- list(a=1,b=2,c=3)
myfxn <- function(var1,var2){
  var1*var2
}
var2 <- 2

sapply(mylist,myfxn,var2=var2)
-
How to manually scale data in R exactly the same as the base 'scale' function:
#define the data
vec1<-1:20
vec2<-21:40
vecz<-as.matrix(cbind(vec1,vec2))

#define the function
scalez <- function(q,sc){
  #if not scaling then give 0 for sc
  #you could also simplify below as:
  #return(q/sd(q))
  if(sc == 0){
    return(q/sqrt(sum(q^2)/(length(q)-1)))
  }
  else{
    #you could also simplify below as:
    #return((q-mean(q))/sd(q))
    return((q-mean(q))/(sqrt((sum((q-mean(q))^2))/(length(q)-1))))
  }
}

#test our scale function on a vector without centering
uncentered_vec1<-scalez(vec1,sc=0)
uncentered_vec1

#test our scale function on a vector with centering
centered_vec1<-scalez(vec1, sc=1)
centered_vec1

#test the base scale function on a vector without centering
scale_nocenter_vec1<-scale(vec1, center = FALSE)
scale_nocenter_vec1

#test our scale function on a matrix without centering
uncentered_vecz<-apply(vecz,2, scalez, sc=0)
uncentered_vecz

#test the base scale function on a matrix without centering
scale_nocenter_vecz<-scale(vecz, center = FALSE)
scale_nocenter_vecz

#test our scale function on a matrix with centering
centered_vecz<-apply(vecz,2, scalez, sc=1)
centered_vecz

#test the base scale function on a matrix with centering
scale_center_vecz<-scale(vecz, center = TRUE)
scale_center_vecz
-
How to do reverse scaling of scaled data in R:
#define the data
vec1<-1:20
vec2<-21:40
vecz<-as.matrix(cbind(vec1,vec2))


#######################################################################
#define the function for unscaling

unscalez <- function(z,s,c){
  if(is.vector(z)){
    #if scaling was performed with the scale function then the scaled:scale attribute will exist
    if(length(attr(z,'scaled:scale'))>0){
      #if scaling was performed with the scale function and center option then the scaled:center attribute will exist
      if(length(attr(z, 'scaled:center'))>0){
        #if centering occurred 'scaled:scale'=sd(unscaled vector)
        return((z*(attr(z, 'scaled:scale')))+attr(z, 'scaled:center'))
      }
      else{
        #if centering did not occur 'scaled:scale'=sqrt(sum(q^2)/(length(q)-1)), where q is the unscaled vector
        return(z*attr(z, 'scaled:scale'))
      }
    }
    else{
      if(length(c)>0){
        #if centering occurred s=sd(unscaled vector),c=mean(unscaled vector)
        return((z*s)+c)
      }
      else{
        #if centering did not occur, s=sqrt(sum(q^2)/(length(q)-1)), where q is the unscaled vector
        return(z*s)
      }
    }
  }
  else{
    columnz <- list()
    for(t in 1:ncol(z)){
      #if scaling was performed with the scale function then the scaled:scale attribute will exist
      if(length(attr(z,'scaled:scale'))>0){
        #if scaling was performed with the scale function and center option then the scaled:center attribute will exist
        if(length(attr(z, 'scaled:center'))>0){
          #if centering occurred 'scaled:scale'=sd(unscaled vector)
          columnz[[t]]<-(z[,t]*(attr(z, 'scaled:scale')[t]))+attr(z, 'scaled:center')[t]
        }
        else{
          #if centering did not occur 'scaled:scale'=sqrt(sum(q^2)/(length(q)-1)), where q is the unscaled vector
          columnz[[t]]<-(z[,t]*attr(z, 'scaled:scale')[t])
        }
      }
      else{
        if(length(c)>0){
          #if centering occurred s=sd(unscaled vector),c=mean(unscaled vector)
          columnz[[t]]<-((z[,t]*s[t])+c[t])
        }
        else{
          #if centering did not occur, s=sqrt(sum(q^2)/(length(q)-1)), where q is the unscaled vector
          columnz[[t]]<-(z[,t]*s[t])
        }
      }
    }
    matrixz<-do.call(cbind, columnz)
    return(matrixz)
  }
}

#######################################################################

#test the unscalez function on a vector created with the base scale function without centering
scale_nocenter_vec1<-scale(vec1, center = FALSE)
scale_nocenter_vec1
unscalez(scale_nocenter_vec1)

#test the unscalez function on a vector created with the base scale function with centering
scale_center_vec1<-scale(vec1, center = TRUE)
scale_center_vec1
unscalez(scale_center_vec1)

#test the unscalezfunction on a matrix created with the base scale function without centering
scale_nocenter_vecz<-scale(vecz, center = FALSE)
scale_nocenter_vecz
unscalez(scale_nocenter_vecz)

#test the unscalez function on a matrix created with the base scale function with centering
scale_center_vecz<-scale(vecz, center = TRUE)
scale_center_vecz
unscalez(scale_center_vecz)

#######################################################################

#test our unscalez function on a vector created with the scalez function (see previous post) without centering
uncentered_vec1<-scalez(vec1,sc=0)
uncentered_vec1
unscalez(uncentered_vec1,s=12.29035,c=NULL)

#test our unscalez function on a vector created with the scalez function (see previous post) with centering
centered_vec1<-scalez(vec1, sc=1)
centered_vec1
unscalez(centered_vec1,s=5.91608,c=10.5)

#test our unscalez function on a matrix created with the scalez function (see previous post) with centering
centered_vecz<-apply(vecz,2, scalez, sc=1)
centered_vecz
unscalez(centered_vecz,s=c(5.91608,5.916080),c=c(10.5,30.5))

#test our unscalez function on a matrix created with the scalez function (see previous post) without centering
uncentered_vecz<-apply(vecz,2, scalez, sc=0)
uncentered_vecz
unscalez(uncentered_vecz,s=c(12.29035,31.84667),c=NULL)
-
How to calculate R-squared in R:
#where x is the fitted values and y is the actual values
rsq <- function (x, y) {cor(x, y) ^ 2}

#when given the R-squared value:

adj_rsqz<- function (r,n,p) {
  1-(((1-r)*(n-1))/(n-p-1))
}
#where:
#r=r-squared value
#n=total sample size
#p=number of predictors
-
How to get all the attributes and variables associated with an object in R:
str(your_object)